Table of Contents
Why Accurate Measurements Matter
Step-by-Step Guide to Taking Your Measurements
Using Your Measurements for Shopping
How to Take Your Own Clothing Measurements: A Comprehensive Guide for Finding Your Perfect Size
Shopping for clothes can be a fun experience, but it can also be fraught with uncertainty—especially when it comes to sizing.
With varying sizes across different brands and styles, knowing your own measurements can save you time, money, and frustration.
In this extensive guide, we’ll walk you through the process of taking your own clothing measurements, ensuring that you get the best fit every time you shop.
Why Accurate Measurements Matter
Understanding your measurements is crucial for several reasons:
- Consistency Across Brands: Sizes can differ significantly between brands. Knowing your measurements allows you to compare them to brand sizing charts for a more accurate fit.
- Saves Time and Money: By knowing your exact size, you can avoid purchasing items that won’t fit, reducing the need for returns and exchanges.
Essential Tools You’ll Need
Before you begin, gather these items:
- Soft Measuring Tape: This is essential for getting accurate measurements.
- Notepad and Pen: To record your measurements.
- Mirror: To check your positioning.
- Comfortable, Fitting Clothing: Ideally, wear something snug to get the most accurate measurements.
Step-by-step Guide to Taking Your Measurements
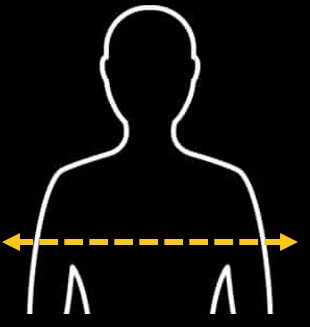
Chest
How to Measure: Stand upright and relax your shoulders. Wrap the measuring tape around the fullest part of your chest, ensuring it’s parallel to the floor. Keep the tape snug but not tight - you should be able to fit a finger underneath it.
What to Record: Note the measurement in inches or centimetres.
Waist
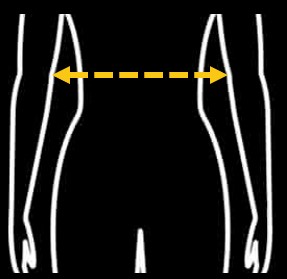
How to Measure: Find your natural waistline—this is usually just above your belly button and below your rib cage. Keep your body relaxed and wrap the tape around your stomach. Make sure it’s level and snug, but not restricting.
What to Record: Write down this measurement.
Hips
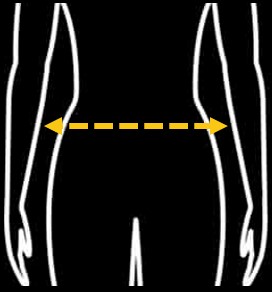
How to Measure: Stand with your feet together.
Measure around the fullest part of your hips, which is usually about 8 inches below your waist.
Ensure the tape is level all the way around and not digging into your skin.
What to Record: Record this measurement carefully.
Inside Leg
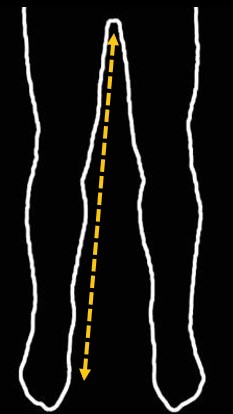
How to Measure: This measurement is typically taken from a pair of trousers that fit you well.
Measure from the crotch seam to the bottom of the leg. For Waders the inside leg measurement is measured all the way down to the sole of the boot.
If measuring yourself, you can also do it from the crotch to your desired hem length.
What to Record: Write down the inseam measurement.
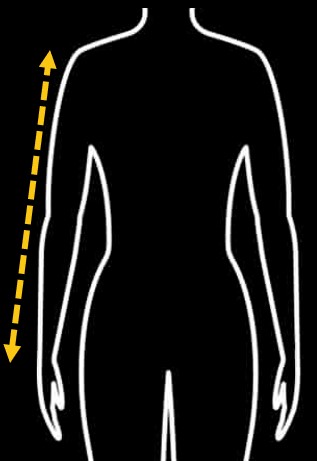
Sleeve Length
How to Measure: With your arm slightly bent, measure from the shoulder seam down to your wrist.
Make sure the tape is taut but not tight.
What to Record: Note this measurement for future reference.
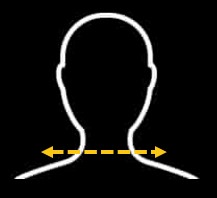
Neck
How to Measure: Measure around the base of your neck, where a collar would sit.
Ensure its snug but comfortable; you can add half an inch for ease if desired.
What to Record: Write down this neck measurement.
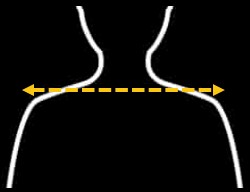
Shoulder Width
How to Measure: Measure from the outer edge of one shoulder to the outer edge of the other shoulder.
Make sure to keep the tape straight and parallel to the ground.
What to Record: This will help when determining the fit of tops and jackets.
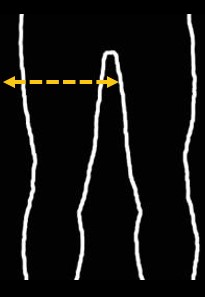
Thigh and Upper Arm (Optional)
Thigh: Measure around the fullest part of your thigh while standing.
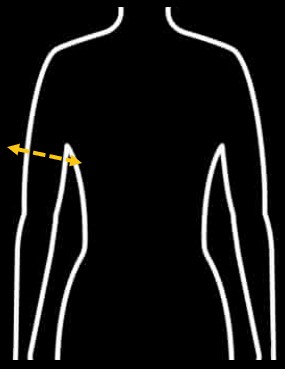
Upper Arm: Measure around the fullest part of your upper arm.

Tips for Accuracy
Ask for Help: If you can, have a friend assist you for the most accurate results.
Stand Up Straight: Good posture is essential for precise measurements.
Double Check: Measure each area at least twice to ensure consistency.
Document Carefully: Keep a clear record of your measurements for easy access when shopping.
Using Your Measurements for Shopping
Once you have your measurements, follow these steps to use them effectively:
- 1. Refer to Size Charts: When shopping online, always refer to the specific size chart of the brand. Compare your measurements against the chart to find your size.
- 2. Consider Fit Type: Understand the fit type you’re looking for (e.g., relaxed, fitted, oversized) and adjust your size choice accordingly.
- 3. Read Reviews: Customer reviews can provide insights into how a garment fits, often indicating if it runs small or large.
- 4. Know Your Preferences: Some people prefer a looser fit, while others prefer a tighter fit. Adjust your size choice based on your style preference.
Conclusion
Taking your own clothing measurements might seem like a daunting task, but it’s a valuable skill that pays off in better fitting clothes.
By following this comprehensive guide, you can confidently shop for clothes that fit well, feel comfortable, and reflect your personal style.
Happy measuring and shopping!
